Setting a New Appointment on GigaBook
Entering or setting new appointments on your Gigabook Calendar
Setting up new appointments is easy from anywhere you are within your GigaBook account! We have added several places throughout the site to make it easy to add new appointments without having to navigate back and forth from page to page!
Here is a basic description of how to enter appointments manually.
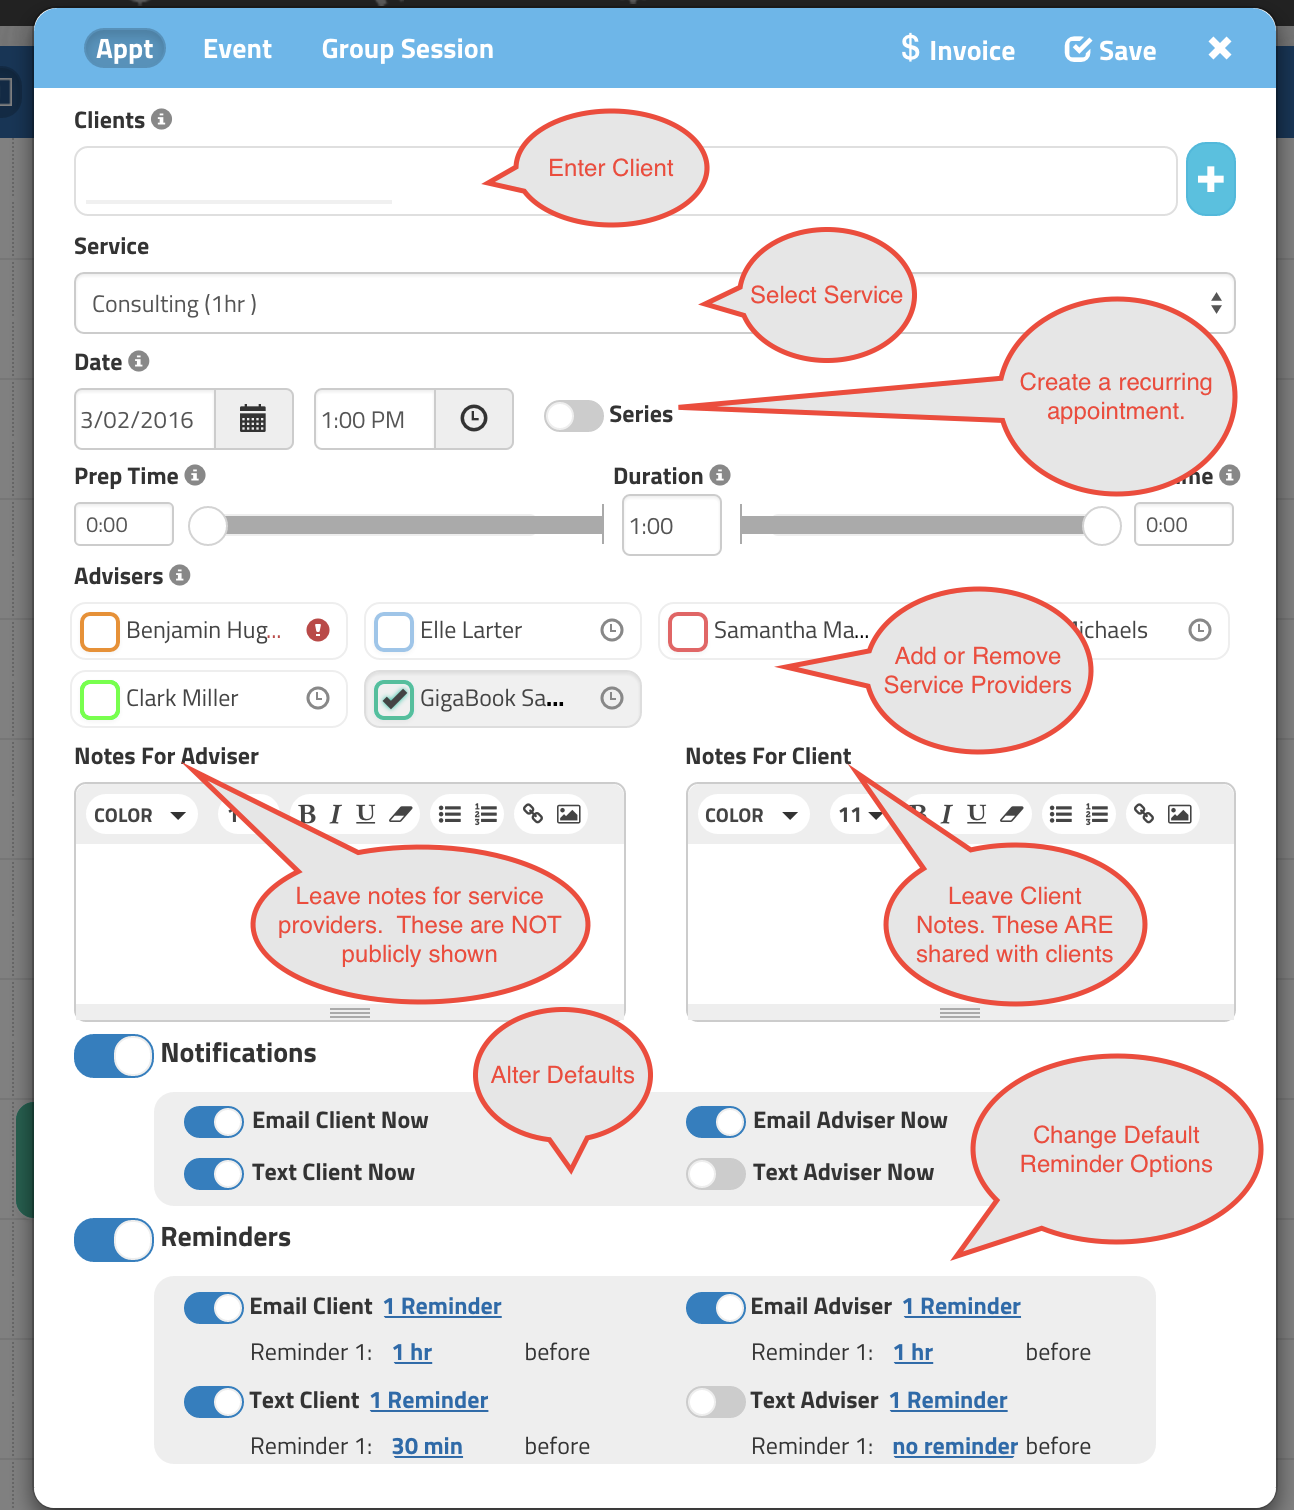
Understanding the Appointment Entry Panel:
- In Clients field, start typing the client’s name and if they are already in the system, they will appear and you can click on them to populate their information. If they are not you can add them now and fill in any additional information by clicking on the ‘Edit’ button next to their name.
- Choose the Service being provided for this Appointment in the dropdown.
- Check the Start Date and Time.
- If this is an Appointment that will reoccur, click the ‘Repeats’ Button, enter who often it is set to repeat and the end date.
- Prep Time = additional time needed by the business provider prior to this Appointment (this can be pre-set). Duration = this will be pre-set, but can be changed if needed. Finish Time = any additional time needed after the appointment to wrap up.
- Staff assigned to the Appointment.
- Notes can be added for the Staff Member or the Client.
- Notifications and Reminders – open the toggle to allow you to set up email and/or text notifications for now and as the appointment time gets near.
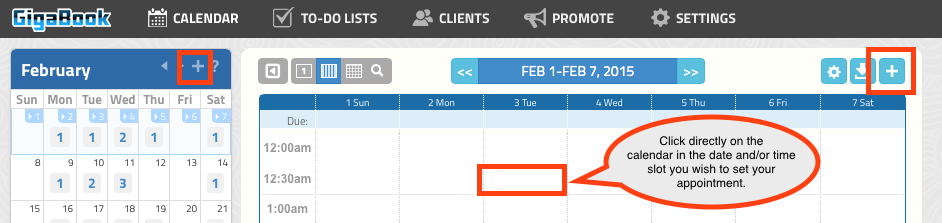
Other ways to quickly activate the new appointment entry panel are:
Using the + icons that you see throughout the site:

Or simply click on the calendar to open the appointment entry panel from the time slot you want to add an appointment on: